This walkthrough shows how to get an example application as present in the core-plot
library working using SwiftUI on MacOS.
Although this example is done on the Mac, there is no reason to assume that the same process would not work for IOS.
1. Create the project
Select: File -> New -> Project...
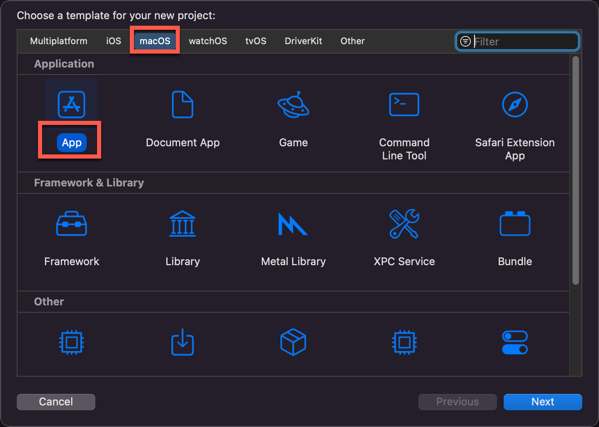
Make certain that MacOS, App is selected and press Next.
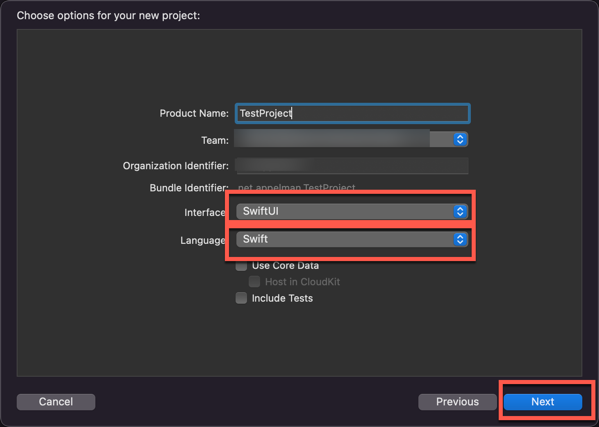
Make certain the interface is using SwiftUI and the language is Swift.
Press next and save the project.
2. Integrate CorePlot
Select: File -> Add packages...
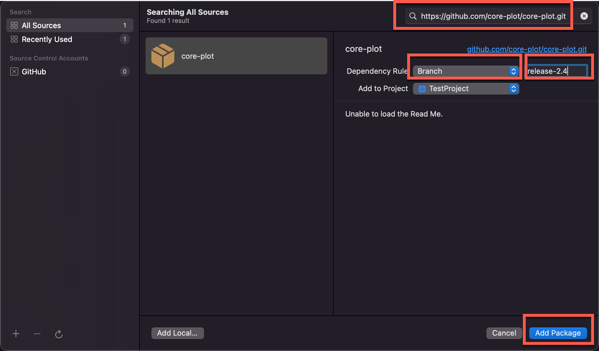
Insert the proper URL in selection field.
Select the branch release-2.4. The default master branch will not work, because it does not have support for the Swift Package
Manager (SPM). Select Add Package and on the next screen select also Add Package.
Just for testing run the application and you should see an hello world but this has nothing to do yet with CorePlot.
3. Create the CorePlot integration
Select File -> New -> File...
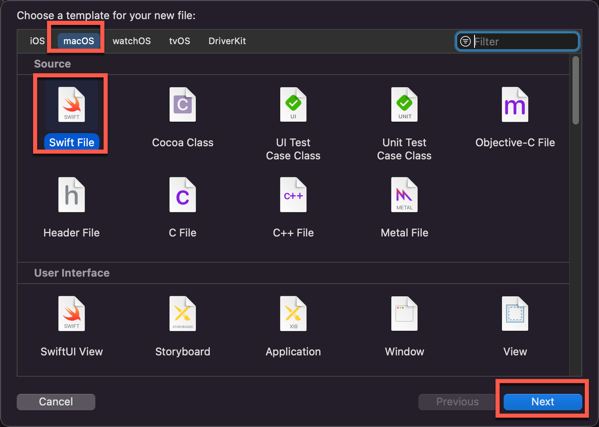
Make certain the MacOS and Swift File are selected.Select Next.
Save the file under the name CorePlot.swift
The outline of the source code is as follows:

- NSViewRepresentable is the glue that allows a non SwiftUI view to be used inside SwiftUI
- makeNSView is a mandatory method that creates the actual View. The code is coming mostly from the example DatePlot application.
- The Coordinator is a class that can be used to manage the view as created in the previous step
- updateNSView() is a method that is called by SwiftUI whenever a change is detected. This method can apply those on the view.
- Coordinator is the manager of the CorePlot view. Note also that the coordinator functions as the DataSource for CorePlot
- External data is initialized when the CorePlot structure is initialized.
3a. makeNSView(Context)
This is the definition of makeNSView:
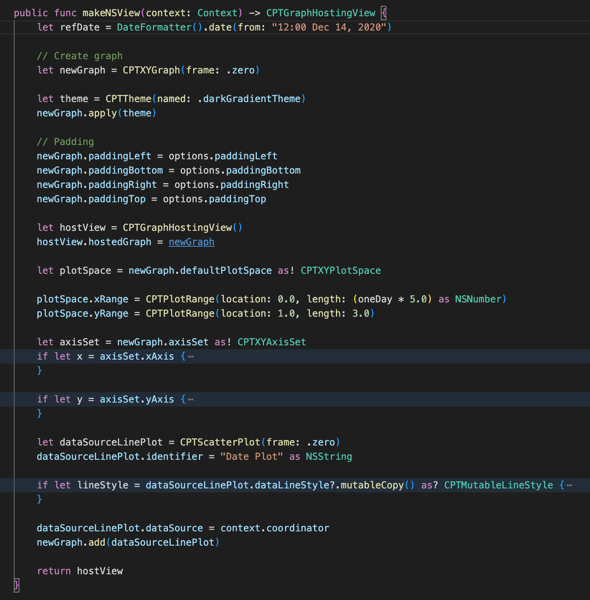
The changes as compared to the awakeFromNib() from the demo application are as follows:
- The plotData is passed into the struct, hence it is not generated here.
- The hostView is no longer optional since the view is generated here. So instead of passing the newGraph to the hostView, the newGraph is assigned to a newly generated CTPGraphHostingView.
- The data source is not the struct itself, but instead the coordinator which is passed in the context.
- The graph is not stored and the created hostview is returned.
3b. makeCoordinator()

This is straight forward. The coordinator is passed self so that it can access the content of the CorePlot instance.
3c. updateNSView()

This method must be present to fulfil the protocol requirements. It is called when the view needs updating, hence the call to reloadData().
3d. Coordinator
The coordinator has no mandatory content.
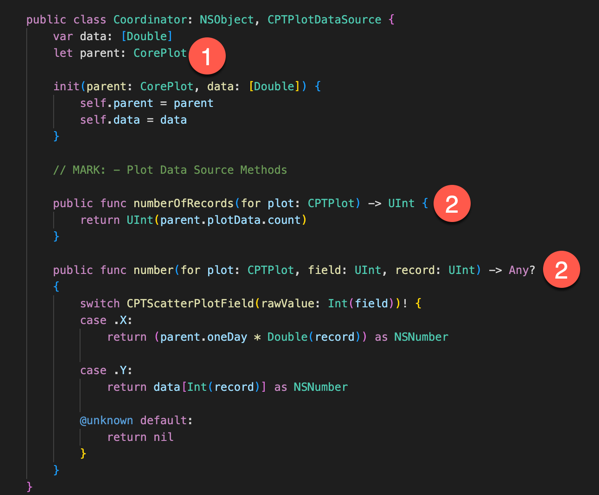
In this implementation
- it has a reference to the CorePlot struct.
- it implements the Data Source methods
4. Use the new CorePlot view
Change the ContentView to look like this:
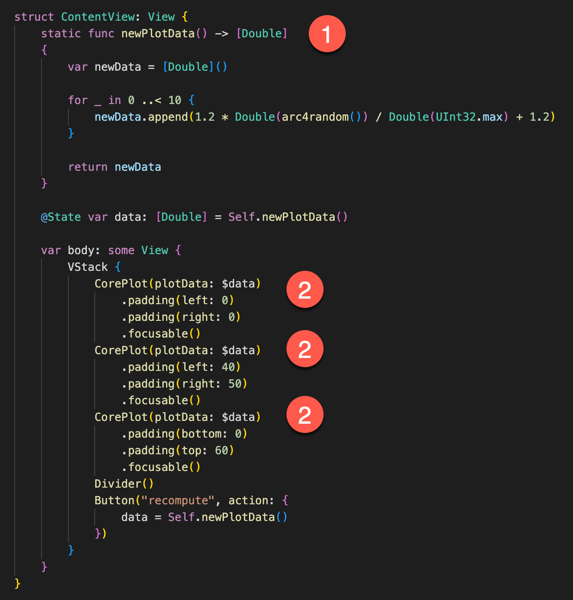
- A helper method to generate the test data
- The instantiation of the CorePlot view. It must pass the mandatory plotData argument.
5. Run
This now is a functioning application. Press run and see the result:

The source of this project can be found on github.
Thank you for posting this, this was very helpful implementing CorePlot in my SwiftUI project. Unfortunately the images are not showing up.
I have recreated the images
I will look into it
Thank you.